Vue.js×GraphQL(AppSync)×AmplifyでTODOリストを作る
Vue.js×GraphQL(AppSync)×AmplifyでTODOリストを作る:
この記事は Vue.js #3 Advent Calendar 2018 の14日目の記事です。
ある日、「Vue.jsとGraphQLでなんか簡単な画面を作るハンズオン的なのできないか?」という要請が来たので、この記事を書きました。
ついでにAmplifyCLIを使えば、より簡単にAWSのサービスを構築することができてアプリ側からの連携も楽になるので、Amplifyも採用しました。
この記事では、Vueでタイトルと内容TODOリスト(みたいなもの)を作成/削除するアプリケーションを、AWSにバックエンドのサービスをデプロイしながら開発していくことを体験することを目的に書いています。お時間のある方はぜひ試してください。
下記がインストール済みであること。
フロントはVue.js(以下、Vue)で書きます。ログイン機能をつけるのでAmazonCognito(以下、Cognito)を採用。
GraphQLはAWSAppSync(以下、AppSync)を使います。TODOリストのデータはDynamoDBに格納します。
Vueプロジェクトをビルドするためのツールをインストールします。ここではVue-CLI3を使っていきます。
インストールが完了したら、バージョンを確認します。
プロジェクトを作成します。
詳細設定をしていきます。
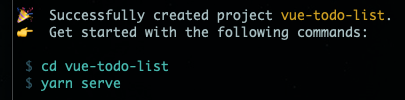
最後まで設定すると自動的にビルド環境がローカルに用意されます。成功すると下のようなメッセージが表示されます。
今回TemplateにPugを利用するので、Pugをビルドするためのパッケージをインストールします。
これでVueプロジェクトの作成は完了です。
AmplifyはAWSリソースとの接続を支援するオープンソースのライブラリです。
強力なCLIツールが提供されていて、AWSリソースの作成をコマンド上で実行し、ライブラリに反映することができます。 現在はCognitoによる認証や、AppSyncを用いたGraphQLの利用などがサポートされています。
参考)AWSAmplifyの公式ドキュメント
Vue-CLIと同様にnpmでインストールします。
インストールできているか確認します。
AmplifyCLIで利用するユーザーを作成します。
ここではAdminユーザーを作成して、
リージョンは
作成したIAMユーザのアクセスキーとシークレットアクセスキーを入力する必要があるので、CSVをダウンロードするなりして保管しておいてください。
最後にAWSCLIのプロファイルとしてユーザーの情報を保存させるので、好きな名前を付けて保存してください。下の画像は
IDEや言語、どういったFrameworkを使っているのかを設定していきます。
途中でどのIAMユーザーを利用するか?と聞かれるのでAdmin権限を持っているユーザーを選択します。
※青くなっている文字が選択した内容です。
ログインのバックグラウンドとしてCognitoを利用するので、AmplifyCLIでデプロイしていきましょう。
ログインなどの認証機能を実装する際に便利なマネージドサービスです。Serverlessにログイン認証を提供してくれます。
ユーザー情報などをCognitoで持ってくれるので、別にDBなどを用意する必要がありません。
参考)Cognitoの公式サイト
まずどのような設定でCognitoをデプロイするかを決めます。
今回はデフォルトのままで問題ないです。
実際にデプロイしましょう
コンソール画面でCognitoが作成されているの確認することができます。
GraphQLを利用するためにAppSyncを用意します。
AWSのサービスに対して、GraphQLで操作するためのサービスです。
GraphQLを利用して、DynamoDBのデータを操作したり、Lambdaをinvokeしたりすることができます。
参考)AppSyncの公式サイト
下の画像の青くなっている文字が選択した内容です。
準備ができたのでデプロイしていきましょう。
途中で「GraphQLAPIのコードを作るか?」と聞かれますが、一旦ここでは作らずに進めます。
このタイミングでAppSyncのAPIとDynamoDBのテーブルが作成されています。
これでAWSの構築が完了しました。
この状態で
AWS側の準備が整ったので、Vueのアプリを作成していきましょう。
VueのUIコンポーネントである
インストールできたらVueに読み込ませます。
また
上部にあるメニューが必要ないので、削除しましょう。
これでアプリ側の準備が整いました。
「サインアップする」をクリック
メールアドレス(EmailAddress) / ユーザー名(ID) / パスワード(Password) を入力して「サインアップ」をクリック
検証コードがメールアドレスに送信されるので、そのコードを入力して「ユーザーの有効化」をクリック
これでログインユーザーが作成されました。
先ほど作成したユーザーの情報を入力して「サインイン」をクリック
ログインできるとTODOリストページに遷移します。
TODOリストを作成します。
タイトルと内容を入力して「作成」をクリック。
追加されました。実際にDynamoDBに書き込まれています。
TODOリストを削除します。
作成済みのリストにある「削除」をクリック。
削除されました。DynamoDBからも削除されています。
現状できることはこんな感じです。
ここまでできた内容からさらに発展させていきましょう。
例えば、TODOリストの作成と削除まですることができるようになっていますが、更新ができるようにVueファイルを編集してみたり、TODOリストに残せる内容を増やしてみたりなどなど…
またこのアプリを公開するためにデプロイする必要がありますね。
ビルドしてS3にアップロードしてWebサイトホスティングするもよし、AmplifyConsoleを利用してデプロイしても良しです!
アプリをアップデートして更にVueやGraphQL(AppSync)の知識を深めましょう!
ではまた!!!
この記事は Vue.js #3 Advent Calendar 2018 の14日目の記事です。
はじめに
ある日、「Vue.jsとGraphQLでなんか簡単な画面を作るハンズオン的なのできないか?」という要請が来たので、この記事を書きました。ついでにAmplifyCLIを使えば、より簡単にAWSのサービスを構築することができてアプリ側からの連携も楽になるので、Amplifyも採用しました。
この記事では、Vueでタイトルと内容TODOリスト(みたいなもの)を作成/削除するアプリケーションを、AWSにバックエンドのサービスをデプロイしながら開発していくことを体験することを目的に書いています。お時間のある方はぜひ試してください。
前提条件
下記がインストール済みであること。- Node.js / npm
- AWSCLI
アーキテクチャ
フロントはVue.js(以下、Vue)で書きます。ログイン機能をつけるのでAmazonCognito(以下、Cognito)を採用。GraphQLはAWSAppSync(以下、AppSync)を使います。TODOリストのデータはDynamoDBに格納します。
完成品
手順1. Vue-CLIのインストール
Vueプロジェクトをビルドするためのツールをインストールします。ここではVue-CLI3を使っていきます。$ npm install -g @vue/cli
$ vue -V
手順2. Vueプロジェクト作成
プロジェクトを作成します。$ vue create vue-todo-list
最後まで設定すると自動的にビルド環境がローカルに用意されます。成功すると下のようなメッセージが表示されます。
cd vue-todo-list して yarn serve とすると、このようなデフォルト画面が表示されます。今回TemplateにPugを利用するので、Pugをビルドするためのパッケージをインストールします。
$ vue add pug
手順3. AmplifyCLIでAWSサービスを準備する
そもそもAmplifyとは?
AmplifyはAWSリソースとの接続を支援するオープンソースのライブラリです。強力なCLIツールが提供されていて、AWSリソースの作成をコマンド上で実行し、ライブラリに反映することができます。 現在はCognitoによる認証や、AppSyncを用いたGraphQLの利用などがサポートされています。
参考)AWSAmplifyの公式ドキュメント
AmplifyCLIのインストール
Vue-CLIと同様にnpmでインストールします。$ npm i -g @aws-amplify/cli
$ amplify
Amplify用のユーザー作成
AmplifyCLIで利用するユーザーを作成します。ここではAdminユーザーを作成して、
amplify というProfile名でAWSCLIに保存します。リージョンは
ap-northeast-1 (東京リージョン)を、ユーザー名はデフォルトのまま作成してください。作成したIAMユーザのアクセスキーとシークレットアクセスキーを入力する必要があるので、CSVをダウンロードするなりして保管しておいてください。
最後にAWSCLIのプロファイルとしてユーザーの情報を保存させるので、好きな名前を付けて保存してください。下の画像は
amplify というプロファイル名で保存しています。$ amplify configure
Amplifyの初期化
IDEや言語、どういったFrameworkを使っているのかを設定していきます。途中でどのIAMユーザーを利用するか?と聞かれるのでAdmin権限を持っているユーザーを選択します。
※青くなっている文字が選択した内容です。
$ amplify init
Successfully created ... というメッセージが表示されたので、AmplifyCLIを利用する準備ができました。
手順4. Cognitoをデプロイする
ログインのバックグラウンドとしてCognitoを利用するので、AmplifyCLIでデプロイしていきましょう。
そもそもCognitoって?
ログインなどの認証機能を実装する際に便利なマネージドサービスです。Serverlessにログイン認証を提供してくれます。ユーザー情報などをCognitoで持ってくれるので、別にDBなどを用意する必要がありません。
参考)Cognitoの公式サイト
デプロイ準備
まずどのような設定でCognitoをデプロイするかを決めます。今回はデフォルトのままで問題ないです。
$ amplify auth add
デプロイ実行
実際にデプロイしましょう$ amplify auth push
✔ All resources are updated in the cloud というメッセージが出れば成功です。コンソール画面でCognitoが作成されているの確認することができます。
手順5. AppSyncをデプロイする
GraphQLを利用するためにAppSyncを用意します。
そもそもAppSyncって?
AWSのサービスに対して、GraphQLで操作するためのサービスです。GraphQLを利用して、DynamoDBのデータを操作したり、Lambdaをinvokeしたりすることができます。
参考)AppSyncの公式サイト
デプロイ準備
下の画像の青くなっている文字が選択した内容です。-
Provide API nameには任意のAPI名をつけてください。 - APIをCognito認証で利用するので、
Amazon Cognito User Poolを選択。 - TODOリストを作成するためのSchemaが用意されているので、今回はすでに用意されているSchemaを利用します。
$ amplify api add
デプロイ
準備ができたのでデプロイしていきましょう。途中で「GraphQLAPIのコードを作るか?」と聞かれますが、一旦ここでは作らずに進めます。
$ amplify api push
✔ All resources are updated in the cloud というメッセージが出れば成功です。このタイミングでAppSyncのAPIとDynamoDBのテーブルが作成されています。
これでAWSの構築が完了しました。
この状態で
./src 以下に aws-exports.js が生成されているので、このファイルをコピーして aws-exports.ts を作成しておいてください。
手順6. 画面の作成
AWS側の準備が整ったので、Vueのアプリを作成していきましょう。
プラグインのインストール
VueのUIコンポーネントである Element UI と AWSAmplify 、 @types/node インストールします。$ npm i --save-dev element-ui aws-amplify @types/node
main.ts
import Vue from "vue";
import App from "./App.vue";
import router from "./router";
import store from "./store";

// モジュールの読み込み
import ElementUI from "element-ui";
import "../node_modules/element-ui/lib/theme-chalk/index.css";
import Amplify from "aws-amplify";
import appSyncConfig from "./aws-exports";

Amplify.configure(appSyncConfig); // 追加

Vue.config.productionTip = false;
Vue.use(ElementUI); //追加

new Vue({
  router,
  store,
  render: (h) => h(App),
}).$mount("#app");
@types/node を有効にするために、インストールしたあと tsconfig に node を追加します。tsconfig.json
...
    "types": [
      "webpack-env",
      "node" // 追加
    ],
...
エラーが発生する場合は…
Could not find a declaration file for module 'graphql/language/ast'... や Could not find a declaration file for module '@aws-amplify/ui'... というエラーメッセージが出る。
noImplicitAny オプションを無効にします。 tsconfig.json
...
    "noImplicitAny": false,
...
親Component(App.vue)の修正
上部にあるメニューが必要ないので、削除しましょう。App.vue
<template lang="pug">
  #app
    router-view
</template>

<style lang="scss">
body {
  background-color: #2c3e50;
  margin: 0;
}

#app {
  font-family: 'Avenir', Helvetica, Arial, sans-serif;
  -webkit-font-smoothing: antialiased;
  -moz-osx-font-smoothing: grayscale;
  text-align: center;
  color: #ffffff;
}
</style>
SignInページのVueファイル
src/views/ 以下に SignIn.vue を作成し、内容は下記です。src/views/SignIn.vue
<template lang="pug">
.signin-page
  .title SignIn
  form.signin-form(@submit.prevent="signIn")
    el-row.user-info.input-area
      el-col(:span="6")
        .text ID
      el-col(:span="12")
        el-input(v-model="userID")
    el-row.password-info.input-area
      el-col(:span="6")
        .text Password
      el-col(:span="12")
        el-input(type="password" v-model="password")
    el-button.auth-button(type="primary" native-type="submit") サインイン
    el-button.auth-button(type="info" @click="linkSignUp") サインアップする
</template>

<script lang="ts">
import { Component, Prop, Vue } from "vue-property-decorator";
import { Auth } from "aws-amplify";
import router from "@/router";

@Component({})
export default class SignIn extends Vue {
  password: string = "";
  userID: string = "";

  public signIn() {
    const self = this;
    Auth.signIn(self.userID, self.password)
      .then(user => {
        return router.push("/");
      }).catch(err => {
        console.error(err);
      });
  }

  public linkSignUp() {
    return router.push("/signUp");
  }
}
</script>

<style scoped lang="scss">
.signin-form {
  margin: 40px auto 0;
  width: 40vw;

  .input-area {
    line-height: 60px;
    margin: 10px 0;
  }

  .auth-button {
    font-weight: bold;
    margin-top: 20px;
    width: 40%;
  }
}
</style>
SignUpページのVueファイル
src/views/ 以下に SignUp.vue を作成し、内容は下記です。src/views/SignUp.vue
<template lang="pug">
.signup-page
  .title SignUp
  form.signup-form(@submit.prevent="signUp" v-show="signupForm")
    el-row.email-info.input-area
      el-col(:span="6")
        .text EmailAddress
      el-col(:span="12")
        el-input(v-model="email")
    el-row.user-info.input-area
      el-col(:span="6")
        .text ID
      el-col(:span="12")
        el-input(v-model="userID")
    el-row.password-info.input-area
      el-col(:span="6")
        .text Password
      el-col(:span="12")
        el-input(type="password" v-model="password")
    el-button.auth-button(type="primary" native-type="submit") サインアップ
  form.signup-form(@submit.prevent="userVerify" v-show="!signupForm")
    el-row.email-info.input-area
      el-col(:span="6")
        .text VerifyCode
      el-col(:span="12")
        el-input(v-model="verifyCode")
    el-button.auth-button(type="primary" native-type="submit") ユーザーの有効化
</template>

<script lang="ts">
import { Component, Prop, Vue } from "vue-property-decorator";
import { Auth } from "aws-amplify";
import router from "@/router";

@Component({})
export default class SignUp extends Vue {
  email: string = "";
  password: string = "";
  signupForm: boolean = true;
  userID: string = "";
  verifyCode: string = "";

  public signUp() {
    const self = this;
    Auth.signUp(self.userID, self.password, self.email)
      .then(user => {
        self.signupForm = false;
      }).catch(err => {
        console.error(err);
      });
  }

  public userVerify() {
    console.log("verify!");
    const self = this;
    Auth.confirmSignUp(self.userID, self.verifyCode)
      .then(data => {
        alert("登録完了しました");
        return router.push("/signIn");
      }).catch(err => {
        console.error(err);
      });
  }
}
</script>

<style scoped lang="scss">
.signup-form {
  margin: 40px auto 0;
  width: 40vw;

  .input-area {
    line-height: 60px;
    margin: 10px 0;
  }

  .auth-button {
    font-weight: bold;
    margin-top: 20px;
    width: 40%;
  }
}
</style>
TODOリストページのVueファイル
src/views/ 以下に TODO.vue を作成し、内容は下記です。src/views/TODO.vue
<template lang="pug">
.todo-list-page
  .title TODO List
  .list-area
    el-button.signout(@click="signOut") SignOut
    el-col.todo-card(:span="8")
      el-card.box-card
        .card-header(slot="header")
          el-input(v-model="cardTitle")
        .card-body
          el-input(type="textarea" :rows="10" v-model="cardBody")
        el-button.card-button.card-create-button(type="primary" @click="create") 作成
    el-col.todo-card(:span="8" v-for="item in listItems" :key="item.name")
      el-card.box-card
        .card-header(slot="header")
          .text {{ item.name }}
        .card-body
          .text {{ item.description }}
        el-button.card-button.card-delete-button(type="danger" @click="remove(item.id)") 削除
</template>

<script lang="ts">
import { Component, Vue } from "vue-property-decorator";
import { Auth, API, graphqlOperation } from "aws-amplify";
import router from "@/router";

type listItemType = {
  id: string,
  name: string,
  description: string
};

@Component({})
export default class TODO extends Vue {
  cardBody: string = "";
  cardTitle: string = "";
  listItems: listItemType[] = [];

  created() {
    this.getListItems();
  }

  public signOut() {
    Auth.signOut().then(data => {
      return router.push("/signIn");
    }).catch(err => {
      console.error(err);
    });
  }

  // ログインしていない場合にサインインページに遷移する
  public checkAuthUser() {
    const authUser = localStorage.getItem("CognitoIdentityServiceProvider.41ff3c1rr4o11fi1elup4p7k6q.LastAuthUser");
    if (authUser === null) {
      router.push("/signIn");
    }
  }

  // TODOリストの作成
  public async create() {
    const gqlBody = `
      mutation create {
        createTodo(input: {
          name: "${this.cardTitle}"
          description: "${this.cardBody}"
        }) {
          id
          name
          description
        }
      }
    `;
    const result: any = await API.graphql(graphqlOperation(gqlBody));
    this.listItems.unshift(result.data.createTodo);
  }

  // TODOリストの削除
  public async remove(id: string) {
    console.log(id);
    const gqlBody = `
      mutation delete {
        deleteTodo(input: {
          id: "${id}"
        }) {
          id
        }
      }
    `;
    const result: any = await API.graphql(graphqlOperation(gqlBody));
    const newListItems: listItemType[] = [];
    this.listItems.filter(item => {
      console.log(item);
      if (result.data.deleteTodo.id !== item.id) {
        newListItems.push(item);
      }
    });
    this.listItems = newListItems;
  }

  // TODOリスト取得
  public async getListItems() {
    const gqlBody = `
      query list {
        listTodos(limit: 10) {
          items {
            id
            name
            description
          }
        }
      }
    `;
    const result: any = await API.graphql(graphqlOperation(gqlBody));
    this.listItems = result.data.listTodos.items;
  }
}
</script>

<style scoped lang="scss">
.list-area {
  margin: 28px auto 0;
  width: 90vw;

  .signout {
    font-weight: bold;
    position: absolute;
    right: 40px;
    top: 40px;
  }

  .todo-card {
    padding: 15px;

    .box-card {
      height: 380px;
      position: relative;

      .card-body {
        text-align: left;
      }

      .el-button {
        font-weight: bold;

        &.card-button {
          bottom: 10px;
          left: 0;
          margin: auto;
          position: absolute;
          right: 0;
          width: 80px;
        }
      }
    }
  }
}
</style>
Routeの設定
router.ts の内容を下記のように書き換えます。router.ts
import Vue from "vue";
import Router from "vue-router";
import SignIn from "./views/SignIn.vue";
import SignUp from "./views/SignUp.vue";
import TODO from "./views/TODO.vue";

Vue.use(Router);

export default new Router({
  mode: "history",
  base: process.env.BASE_URL,
  routes: [
    {
      path: "/",
      name: "TODO",
      component: TODO,
    },
    {
      path: "/signIn",
      name: "signIn",
      component: SignIn,
    },
    {
      path: "/signUp",
      name: "signUp",
      component: SignUp,
    },
  ],
});
手順7. 動作の確認
サインアップ
「サインアップする」をクリックメールアドレス(EmailAddress) / ユーザー名(ID) / パスワード(Password) を入力して「サインアップ」をクリック
検証コードがメールアドレスに送信されるので、そのコードを入力して「ユーザーの有効化」をクリック
これでログインユーザーが作成されました。
サインイン
先ほど作成したユーザーの情報を入力して「サインイン」をクリックログインできるとTODOリストページに遷移します。
TODOリストの作成/削除
作成
TODOリストを作成します。タイトルと内容を入力して「作成」をクリック。
追加されました。実際にDynamoDBに書き込まれています。
削除
TODOリストを削除します。作成済みのリストにある「削除」をクリック。
削除されました。DynamoDBからも削除されています。
現状できることはこんな感じです。
さいごに
ここまでできた内容からさらに発展させていきましょう。例えば、TODOリストの作成と削除まですることができるようになっていますが、更新ができるようにVueファイルを編集してみたり、TODOリストに残せる内容を増やしてみたりなどなど…
またこのアプリを公開するためにデプロイする必要がありますね。
ビルドしてS3にアップロードしてWebサイトホスティングするもよし、AmplifyConsoleを利用してデプロイしても良しです!
アプリをアップデートして更にVueやGraphQL(AppSync)の知識を深めましょう!
ではまた!!!
コメント
コメントを投稿