react nativeと簡単APIで作るお天気アプリ(iPhone)
react nativeと簡単APIで作るお天気アプリ(iPhone):
初めまして!ライフイズテックメンターのニーザです。【2018総集編!僕は寿司より焼き肉派!今年話題の焼肉店ベスト10】でも書こうかなと思っている矢先に、アドベントカレンダーの季節がやってきました。
Life is Techのアドベントカレンダーの4日目を担当します。
今年からは公式のアドベントカレンダーということもあり、少し真面目な感じで書いていきたいと思います。
ところで皆さんJavascriptという言語を知っていますでしょうか?
馴染みのない人からしたら、「Javaの親戚的な感じ」
webを主にやっている人から見ると、「サイトに動的な動きをつけるもの」だったり、「非同期処理をするもの」
のように見えるのでは無いでしょうか。
実はJavascriptは本当になんでもできてしまう言語なんです!
今日は、最近話題のreact nativeというJavascriptのフレームワークを用いてアプリを作っていきたいと思います!
ただ、チュートリアルをやるとなると、
公式:react native tutorial
などや、「react native tutorial」のように検索すると出てくる「TODO LIST」をやることが多いのではないでしょうか??
それだと実際つまらないので今回は、みんな大好きYoutubeのAPIを用いて 今回はこちらの天気情報取得APIを用いて、React NativeでiPhoneアプリを作っていきたいと思います。(Androidは余力があればすぐに対応させます!)
※初めてこういった記事を書くので、ここが違う!とかここはこのコードの方がいいのでは?みたいなのがある場合はどしどし教えて欲しいです!!
React Nativeとは一言で言うと、
コマンド一つでAndroidアプリや、iPhoneアプリ両方を作れる
Javascriptのフレームワークです!
皆さんご存知あのfacebookが公開しています。
React-Nativeを始める時には以下の物が必要なので確認していきましょう!
まずはNode.jsが必要です。
Nodeはbrewで入れますが、バージョンの違いによる誤作動を防ぐために、
を先に行いましょう。
その後に、こちらのコマンドを実行してください!
Node.jsというのは、Javascriptでサーバーサイド側を賄うために必要なものです!(ざっくり)
もしすでにNodeが入っている場合は、バージョンが8.3以上にしてください!
RN CLI(React Native Command Line Interface)のインストール
React Nativeを用いてアプリを作成するために必要な機能がたくさん詰まったものです。
xcode iPhoneのシュミレーターで試すために必要なもの。
公式サイト:https://developer.apple.com/jp/xcode/
watchmanをbrewで入れる
これはface bookがReact Nativeでアプリを作る際にリコメンドしてるファイルの変更を監視するものです
なんとこれだけで雛形が作られました!
ファイル構成を見てみましょう!
ls と打ってみてください。
下のようなdirectory構造になっていると思います。

ここでファイル構造を説明するより、まずはiPhone向けでbuildしてみましょう!
下記のコマンドを実行してみてください!
するとビルトが始まります!下のような画面が出ればビルド成功です!(初回のビルドは結構時間がかかります)
React Nativeの良いところは、ファイルの変更をした時にビルドをし直す必要がないというところです!
iPhoneアプリを開発したことがある人ならおわかりだと思いますが、
ちょっとしたviewの変更ですらもう一度ビルドしなおさければいけません。
しかし、React Nativeなら
ですぐにでも変更が見れるのです。
早速変更していきましょう!!
App.jsを見ると下記のようなファイル構造になっていると思います。
ここで、
すると下のような画面になると思います。
なんとこれだけで、コードの変更が反映されてしまいます��
React Nativeはもっと便利な機能がありますそれはLive reloadという機能です!
これによって保存することで、リロードすることなく変更分を反映してくれます。
便利だぞ! React Native��
次からいよいよ本題である、youtube apiを用いたアプリを作成してみましょう!
下のように作成していきたいと思います。
1. viewの作成
2. stateの作成
3. apiを用いたviewの変更
ゴールはこんな感じです!
まずはheaderを作っていきましょう!
ここでは僕はやりやすいので、一番小さいcomponentから作成します。
ということで、app.jsの中身をこのように変更しましょう!
これでheaderのtitleは完成です。
それでは、headerの作成を行っていきましょう。
ここでは分かりやすいように、headerに色を付けています!
ポイント
・viewでくくる。
・textAlignを設定することで、文字を中央寄せ。
・justifyContent: 'center',によってコンテンツを上下の中央揃え。
・alignItems: 'stretch',によって横にheaderを広げる。
するとこの様になると思います!
header Componentの完成です��
ここで一番親のコンポーネントである、を削除してみましょう!
肝心のコンポーネントが上に入ってしまいました。
iPhoneでいう、safe areaというのがReact Nativeではdefaltで、定義されていないためです。
ここでポイント
・Reactはhtmlと同じように上からレンダリングする。
・styleSheetはwebの見た目でいうcssと同じ。
であるので、styles.headerを変更して被らないようにしてあげましょう
これによって被ることは避けることができました!
しかし、これではpaddingが固定なのでiPhoneのサイズが変更になった時に対応できません。
なのでこのように変更しましょう!
これをReact Nativeが提供しているSafeAreaViewを用いて解決しています。
これは、iOS向けに提供されているもので、iOS 11以降の端末にしか対応していませんので少し注意が必要です。
完成形に近い色に変更し、headerの名前を変更すると、次のような画面になります。
※youtube APIを使う前提だったのでここは後で直します
しかしこののままApp.jsに要素を追加していくとApp.jsが読みにくくなってしまいます。
ここで、Header自体をComponent化して別のファイルに新しく定義してそれを呼び出すよう変更しましょう!
以上でheaderが遂に完成です��
すべてが青くなってしまっているのは、今header以外にcomponentが無いためなので、ご安心ください!
・下の写真の様な検索バーを作成していきます。
・TextInputは、htmlでいうinputタグ
・レイアウトの調整をしたい時、Viewで囲いstyleをかけてあげる。
TextInputは、React Nativeで用意されている、入力をするためのcomponentです。
ここで、TextInputをViewの子要素 にしているところが大切です!
そのままTextInputをViewの中にそのまま置いてしまうと、背景がSafeAreaの色になってしまうためです。
あとは、他のComponentと同じようにstyleをつけてあげましょう。
これで入力部分は完成です!
これからWeatherComponentを作っていきます!
天気を表示するコンポーネントの作成
まずはApp.jsの変更点です。
次に、Weatherコンポーネントを作成していきます。
画像を表示する時に使用するコンポーネントです。
まんまですね。
主にスクリーンの高さや横幅を取る時に使うものです!
今回は、画像の高さと横幅を決定するために作りました!
これで見た目部分に関して、実装ができています!
...........................................
しかし!!
今回作成するアプリでは、今日の天気と明日の天気を表示します。
どちらも全く同じ見た目なので使い回すことができそうです。
ここでReact Nativeの強みが発揮されます。それがコンポーネントの使い回しです!
ここでHeaderを定義した時のように、別のファイルに定義してあげましょう!
しかしこれでは、使い回したいのに、天気や気温などが全く同じ表示になってしまっています。
これを解決するのが、propsという機能です。
詳しくはこちらに書いてありますのでまずは実践していきましょう!
ここで
これによって
それでは、
ここで親コンポーネントから来たpropsの値を変数に代入しています。
これで値を動的に変更することができます。
Reactでは非常によく使います。
基本的にapiとのやり取りをするのは一番上のコンポーネントでその結果を子コンポーネントに渡すことで、stateの管理をしやすくしています
これで無事表示の部分が完成しました!
・stateを用いてinputの変更をconsoleに表示します。
・stateを用いた状態管理。
・stateをtextInputで変更する。
・JS Debug Remotlyを用いてのデバック
将来的なゴールは入力した値を元に、apiを用いて情報を取得することですが、今回はtextInputで入力した値をconsoleに表示するところまでやっていきたいと思います。
まずはdebugを自分のブラウザでできるようにしましょう!
を押して、下の画像のブラウザでデバックできるようにしましょう!
できたらブラウザの開発者ツールを用いて準備完了です
このようにApp.jsを変更してください
ここでは、TextInputのvalueが変更された時、
onChangeTextの中身は、下のようになっています。
引数にtextを取る関数です。
でstateのinputTextを更新しています。
stateのinputTexは上のような書き方で取り出すことができます。
stateはこのようにclass内で初期化して宣言することができ、宣言しないとエラーが起きてしまいます。
以上でtextInputの出力の保存が終了です!
次はいよいよTextInputの入力からapiを通じて地域の天気を取得しましょう!!
・欲しい地域の天気情報をconsoleに出力します
・axiosを使って、apiとやりとりする。
・onChangeTextからonEndEdthingにする
React Nativeではネットワーク用に、Fetch APIを提供してくれていますが、今回は簡略化のためにaxiosというパッケージを使います!
まずはaxiosを入れましょう。
ターミナルを開いて、projectの階層で
を実行してみてください。
この時、iPhoneのシュミレーターがエラーになりますが、それはaxiosのpackageが読み込まれていないためです。
を実行してみましょう!もし一回実行して駄目な場合は、
この処理を終了してから試してみてください!
これで下のようにimportしてあげれば準備は完了です。
それではaxiosを使って天気の情報を取得してみましょう!
ここで注意です!本来は自分の地域の名前を入力=>天気を表示させたかったのですが、こちらのLive Door天気情報APIが対応していないため、ここから住んでる地域に一番近のIDを探してください!笑
今回使うのは僕が大好きな横浜の天気を取ってきたいと思います。
横浜のIDが 140010 であるので、
これで入力したIDの地域のIDがconsoleで次のように表示できていたら完成です!
下に詳細を乗っけていますので一つ一つ確認していきましょう
ここでaxiosのインスタンスをつくっています!
基本的な設定はこのようにconstで定義して起きましょう。
ここで、実際にAPIにリクエストを投げています。
今回はcityとしてparamsの値は固定にしてあります。

このようにlogに表示されたら完成です!
しかし、今回onChangeTextで毎回リクエストを飛ばしてしまっているため、無駄なリクエストが飛んでしまいます!
リクエストを投げる時を一回、つまりtextの変更が終わってから飛ばすようにします。
下のように変更してください。
onChangeTextからonEndEditingに変更しました。
ここで注意が必要なのが、
onEndEdithingから渡ってくるものはtextではないところです。
これで残りは、表示の部分となりました!
・apiから返ってきた情報を表示する。
・propsをつかって子コンポーネントに情報を渡す。
ここから今まで使ってきたことの組み合わせになります。
まずはコードを確認してください!
ここでの変更点は、以下の点です。
・Weatherコンポーネントにpropsとしてinformationを渡す。
ここでの変更点は、以下の点です。
・app.jsからやってきたpropsを定数に代入。
・informationがまだない時は、空のViewコンポーネントを返す。
・タイトルを動的に変更するようにした。
これで遂にアプリが完成です!
お疲れ様でした����
ここにgifが入る予定。
最後の方は駆け足になってしまいましたが、これで完成です!
本当はもうちょっと補足したいのですが、そこは加筆いたしますmm
最初はyoutube APIを使いたかったのですが、認証やアクセスキーを作ったりと少し煩雑だったので、使いやすいAPIを探すに結構苦労しました(汗
でもこういった記事を書くのが初めてでしたが、結構楽しかったです!
公開が遅くなりまして申し訳ないですmm
明日はふみっちの「iOS純正アプリカレンダーのデータを取得する記事」です!
カレンダーの取得はやってみたことがないので今から楽しみですね✨他のメンターの記事もお楽しみに!!
はじめに
初めまして!ライフイズテックメンターのニーザです。【2018総集編!僕は寿司より焼き肉派!今年話題の焼肉店ベスト10】でも書こうかなと思っている矢先に、アドベントカレンダーの季節がやってきました。Life is Techのアドベントカレンダーの4日目を担当します。
今年からは公式のアドベントカレンダーということもあり、少し真面目な感じで書いていきたいと思います。
ところで皆さんJavascriptという言語を知っていますでしょうか?
馴染みのない人からしたら、「Javaの親戚的な感じ」
webを主にやっている人から見ると、「サイトに動的な動きをつけるもの」だったり、「非同期処理をするもの」
のように見えるのでは無いでしょうか。
実はJavascriptは本当になんでもできてしまう言語なんです!
今日は、最近話題のreact nativeというJavascriptのフレームワークを用いてアプリを作っていきたいと思います!
ただ、チュートリアルをやるとなると、
公式:react native tutorial
などや、「react native tutorial」のように検索すると出てくる「TODO LIST」をやることが多いのではないでしょうか??
それだと実際つまらないので今回は、
※初めてこういった記事を書くので、ここが違う!とかここはこのコードの方がいいのでは?みたいなのがある場合はどしどし教えて欲しいです!!
対象読者
- React Nativeというのがどのようなものかざっくり理解したい人。
- React Nativeを触ったことがない人。
- ToDo List以外も作ってみたいよーという人
React Nativeとは
React Nativeとは一言で言うと、コマンド一つでAndroidアプリや、iPhoneアプリ両方を作れる
Javascriptのフレームワークです!
皆さんご存知あのfacebookが公開しています。
完成形
事前準備
React-Nativeを始める時には以下の物が必要なので確認していきましょう!まずはNode.jsが必要です。
Nodeはbrewで入れますが、バージョンの違いによる誤作動を防ぐために、
brew updateを先に行いましょう。
その後に、こちらのコマンドを実行してください!
brew install nodeNode.jsというのは、Javascriptでサーバーサイド側を賄うために必要なものです!(ざっくり)
もしすでにNodeが入っている場合は、バージョンが8.3以上にしてください!
RN CLI(React Native Command Line Interface)のインストール
npm i -g react-native-cliReact Nativeを用いてアプリを作成するために必要な機能がたくさん詰まったものです。
xcode iPhoneのシュミレーターで試すために必要なもの。
公式サイト:https://developer.apple.com/jp/xcode/
watchmanをbrewで入れる
brew install watchmanこれはface bookがReact Nativeでアプリを作る際にリコメンドしてるファイルの変更を監視するものです
雛形の作成
react-native init weatherApp
ファイル構成を見てみましょう!
ls と打ってみてください。
下のようなdirectory構造になっていると思います。
ここでファイル構造を説明するより、まずはiPhone向けでbuildしてみましょう!
下記のコマンドを実行してみてください!
react-native run-ios
基本的な説明
React Nativeの良いところは、ファイルの変更をした時にビルドをし直す必要がないというところです!iPhoneアプリを開発したことがある人ならおわかりだと思いますが、
ちょっとしたviewの変更ですらもう一度ビルドしなおさければいけません。
しかし、React Nativeなら
Command + Rですぐにでも変更が見れるのです。
早速変更していきましょう!!
App.jsを見ると下記のようなファイル構造になっていると思います。
import React, {Component} from 'react';
import {Platform, StyleSheet, Text, View} from 'react-native';

const instructions = Platform.select({
  ios: 'Press Cmd+R to reload,\n' + 'Cmd+D or shake for dev menu',
  android:
    'Double tap R on your keyboard to reload,\n' +
    'Shake or press menu button for dev menu',
});

type Props = {};
export default class App extends Component<Props> {
  render() {
    return (
      <View style={styles.container}>
        <Text style={styles.welcome}>Welcome to React Native!</Text>
        <Text style={styles.instructions}>To get started, edit App.js</Text>
        <Text style={styles.instructions}>{instructions}</Text>
      </View>
    );
  }
}

const styles = StyleSheet.create({
  container: {
    flex: 1,
    justifyContent: 'center',
    alignItems: 'center',
    backgroundColor: '#F5FCFF',
  },
  welcome: {
    fontSize: 20,
    textAlign: 'center',
    margin: 10,
  },
  instructions: {
    textAlign: 'center',
    color: '#333333',
    marginBottom: 5,
  },
});
<View style={styles.container}>の中身を下記のように変更して、Command + Rで再起動してみましょう・// 省略
<View style={styles.container}>
<Text>Hello World!</Text>
</View>
なんとこれだけで、コードの変更が反映されてしまいます��
React Nativeはもっと便利な機能がありますそれはLive reloadという機能です!
Command + Dを押して下記のようにEnable Live reloadを押してみましょうこれによって保存することで、リロードすることなく変更分を反映してくれます。
便利だぞ! React Native��
次からいよいよ本題である、youtube apiを用いたアプリを作成してみましょう!
見た目の作成
下のように作成していきたいと思います。1. viewの作成
2. stateの作成
3. apiを用いたviewの変更
viewの作成
ゴールはこんな感じです!まずはheaderを作っていきましょう!
ここでは僕はやりやすいので、一番小さいcomponentから作成します。
ということで、app.jsの中身をこのように変更しましょう!
import React, { Component } from 'react';
import { StyleSheet, Text, View } from 'react-native';

type Props = {};
export default class App extends Component<Props> {
  render() {
    return (
      <View style={styles.container}>
        <Text style={styles.header_title}>Tube Pick</Text>
      </View>
    );
  }
}

const styles = StyleSheet.create({
  container: {
    flex: 1,
    justifyContent: 'center',
    alignItems: 'center',
    backgroundColor: '#F5FCFF',
  },
  header_title: {
    fontSize: 24,
    color: '#282828'
  }
});
それでは、headerの作成を行っていきましょう。
ここでは分かりやすいように、headerに色を付けています!
// 省略
<View style={styles.header}>
  <Text style={styles.header_title}>Tube Pick</Text>
</View>

// 省略
const styles = StyleSheet.create({
  container: {
    flex: 1,
    justifyContent: 'center',
    alignItems: 'stretch',
    backgroundColor: '#F5FCFF',
  },
  header_title: {
    fontSize: 24,
    color: '#282828',
    textAlign: 'center'
  },
  header: {
    height: 50,
    justifyContent: 'center',
    backgroundColor: '#e74c3c'
  }
});
・viewでくくる。
・textAlignを設定することで、文字を中央寄せ。
・justifyContent: 'center',によってコンテンツを上下の中央揃え。
・alignItems: 'stretch',によって横にheaderを広げる。
するとこの様になると思います!
header Componentの完成です��
ここで一番親のコンポーネントである、を削除してみましょう!
肝心のコンポーネントが上に入ってしまいました。
iPhoneでいう、safe areaというのがReact Nativeではdefaltで、定義されていないためです。
ここでポイント
・Reactはhtmlと同じように上からレンダリングする。
・styleSheetはwebの見た目でいうcssと同じ。
であるので、styles.headerを変更して被らないようにしてあげましょう
header: {
  justifyContent: 'center',
  backgroundColor: '#e74c3c',
  paddingTop: 40,
}
しかし、これではpaddingが固定なのでiPhoneのサイズが変更になった時に対応できません。
なのでこのように変更しましょう!
import React, { Component } from 'react';
import { StyleSheet, Text, View, SafeAreaView } from 'react-native';

type Props = {};
export default class App extends Component<Props> {
  render() {
    return (
      <SafeAreaView style={styles.safeAreaView}>
        <View style={styles.header}>
          <Text style={styles.header_title}>Tube Pick</Text>
        </View>
      </SafeAreaView>
    );
  }
}

const styles = StyleSheet.create({
  safeAreaView: {
    flex: 1,
    backgroundColor: '#e74c3c'
  },
  header_title: {
    fontSize: 24,
    color: '#282828',
    textAlign: 'center'
  },
  header: {
    justifyContent: 'center',
    backgroundColor: '#e74c3c'
  }
});
これは、iOS向けに提供されているもので、iOS 11以降の端末にしか対応していませんので少し注意が必要です。
完成形に近い色に変更し、headerの名前を変更すると、次のような画面になります。
※youtube APIを使う前提だったのでここは後で直します
しかしこののままApp.jsに要素を追加していくとApp.jsが読みにくくなってしまいます。
ここで、Header自体をComponent化して別のファイルに新しく定義してそれを呼び出すよう変更しましょう!
src/Component/Header.js
import React, { Component } from 'react';
import { View, StyleSheet, Text} from 'react-native';

export default class Header extends Component<Props> {
  render() {
    return (
      <View style={styles.header}>
        <Text style={styles.header_title}>お天気アプリ</Text>
      </View>
    );
  }
}


const styles = StyleSheet.create({
  header_title: {
    fontSize: 24,
    color: '#282828',
    textAlign: 'center',
    fontWeight: '600'
  },
  header: {
    justifyContent: 'center',
    backgroundColor: '#e74c3c'
  }
});
App.js
import React, { Component } from 'react';
import { StyleSheet, Text, View, SafeAreaView } from 'react-native';

import Header from './src/component/Header';

type Props = {};

export default class App extends Component<Props> {

  render() {
    return (
      <SafeAreaView style={styles.safeAreaView}>
        <Header />
      </SafeAreaView>
    );
  }
}

const styles = StyleSheet.create({
  safeAreaView: {
    backgroundColor: '#1e90ff'
  },
});
すべてが青くなってしまっているのは、今header以外にcomponentが無いためなので、ご安心ください!
TextInputの作成
ゴール
・下の写真の様な検索バーを作成していきます。
ポイント
・TextInputは、htmlでいうinputタグ・レイアウトの調整をしたい時、Viewで囲いstyleをかけてあげる。
App.js
import { StyleSheet, Text, View, SafeAreaView, TextInput } from 'react-native';
//省略
<SafeAreaView style={styles.safeAreaView}>
  <Header />
  <View style={styles.inputContainer}>
    <TextInput
      placeholder="検索"
      style={styles.textInput}
    />
  </View>
</SafeAreaView>
<TextInput>TextInputは、React Nativeで用意されている、入力をするためのcomponentです。
ここで、TextInputをViewの子要素 にしているところが大切です!
そのままTextInputをViewの中にそのまま置いてしまうと、背景がSafeAreaの色になってしまうためです。
あとは、他のComponentと同じようにstyleをつけてあげましょう。
App.js
//省略
inputContainer: {
  padding: 10,
  paddingBottom: 5,
  backgroundColor: '#f1f2f6'
},
textInput: {
  height: 40,
  padding: 10,
  borderRadius: 10,
  backgroundColor: '#fff',
  borderColor: '#fff',
  borderWidth: 1
}
Weatherコンポーネントの作成
これからWeatherComponentを作っていきます!
ゴール
天気を表示するコンポーネントの作成
ポイント
- Imageを使って画像を表示
- flex-directionを用いて横並びにする
- justify-contentを用いて、真ん中揃えにする。
- 一つのコンポーネントを使い回す
- propsで値を渡してあげる
まずはApp.jsの変更点です。
App.js
import Header from './src/component/Header';
import Weather from './src/component/Weather';

//省略
<SafeAreaView style={styles.safeAreaView}>
  <Header />
  <View style={styles.inputContainer}>
    <TextInput placeholder="検索" style={styles.textInput} />
  </View>
  <View style={styles.weatherContainer}>
    <Weather />
  </View>
</SafeAreaView>

//省略
weatherContainer: {
  backgroundColor: '#f1f2f6',
  padding: 10,
  paddingBottom: 0
}
src/Component/Weather.js
import React, { Component } from 'react';
import { View, StyleSheet, Text, Image, Dimensions } from 'react-native';


export default class Weather extends Component<Props> {
  render() {
    return (
      <View style={styles.weather}>
        <Text style={styles.weatherTitle}>神奈川県 横浜市の天気</Text>
        <View style={styles.dayWeather}>
      <View style={styles.todayWeather}>
        <View style={styles.todayComonent}>
          <Text style={styles.date}>2018-12-3(今日)</Text>
          <Image style={styles.image} source={{uri: 'http://weather.livedoor.com/img/icon/1.gif'}} />
          <Text style={styles.today_weather}>晴れ</Text>
          <View style={styles.todayTemperature}>
            <Text style={styles.todayWeatherTextHight}>
              16℃
            </Text>
            <Text style={styles.todayWeatherTextLow}>
              6℃
            </Text>
          </View>
        </View>
        <View style={styles.todayComonent}>
          <Text style={styles.date}>2018-12-4(明日)</Text>
          <Image style={styles.image} source={{uri: 'http://weather.livedoor.com/img/icon/5.gif'}} />
          <Text style={styles.today_weather}>晴のち曇</Text>
          <View style={styles.todayTemperature}>
            <Text style={styles.todayWeatherTextHight}>
              20℃
            </Text>
            <Text style={styles.todayWeatherTextLow}>
              4℃
            </Text>
          </View>
        </View>
      </View>
        </View>
      </View>
    );
  }
}

const dimensions = Dimensions.get('window');
const imageHeight = Math.round((dimensions.width * 2) / 3);
const imageWidth = dimensions.width;
const styles = StyleSheet.create({
  weather: {
    backgroundColor: '#fff',
    paddingTop: 10,
    borderRadius: 10,
    marginBottom: 10
  },
  weatherTitle: {
    fontSize: 18,
    textAlign: 'center'
  },
  dayWeather: {
    flexDirection: 'row',
    justifyContent: 'center'
  }
});
<Image>画像を表示する時に使用するコンポーネントです。
まんまですね。
<Dimensions>主にスクリーンの高さや横幅を取る時に使うものです!
今回は、画像の高さと横幅を決定するために作りました!
これで見た目部分に関して、実装ができています!
...........................................
しかし!!
今回作成するアプリでは、今日の天気と明日の天気を表示します。
どちらも全く同じ見た目なので使い回すことができそうです。
ここでReact Nativeの強みが発揮されます。それがコンポーネントの使い回しです!
ここでHeaderを定義した時のように、別のファイルに定義してあげましょう!
src/Modules/DayComponent
import React, { Component } from 'react';
import { View, StyleSheet, Text, Image, Dimensions } from 'react-native';

export default class DayComonent extends Component<Props> {
  render() {
    return (
      <View style={styles.dayComonent}>
        <Text style={styles.date}>2018-12-3(今日)</Text>
        <Image style={styles.image} source={{uri: 'http://weather.livedoor.com/img/icon/1.gif'}} />
        <Text style={styles.day_weather}>晴れ</Text>
        <View style={styles.dayTemperature}>
          <Text style={styles.dayTemperatureHigh}>
            16℃
          </Text>
          <Text style={styles.dayTemperatureLow}>
            6℃
          </Text>
        </View>
      </View>
    );
  }
}


const dimensions = Dimensions.get('window');
const imageHeight = Math.round((dimensions.width * 2) / 3);
const imageWidth = dimensions.width;
const styles = StyleSheet.create({
  dayComonent: {
    justifyContent: 'center',
    alignItems: 'center',
    padding: 10,
  },
  date: {
    fontSize: 12,
    paddingBottom: 5,
  },
  day_weather: {
    fontWeight: '600',
    paddingTop: 5,
    fontSize: 20,
  },
  image: {
    width: imageWidth * 0.3,
    height: imageHeight * 0.3,
    borderRadius: 30,
  },
  dayTemperature: {
    flexDirection: 'row',
    justifyContent: 'center',
    padding: 5,
  },
  dayTemperatureHigh: {
    fontSize: 16,
    color: '#eb4d4b',
    marginRight: 10,
  },
  dayTemperatureLow: {
    fontSize: 16,
    color: '#3498db'
  }
});
<DayComponent>しかしこれでは、使い回したいのに、天気や気温などが全く同じ表示になってしまっています。
これを解決するのが、propsという機能です。
詳しくはこちらに書いてありますのでまずは実践していきましょう!
src/Component/Weather.js
import React, { Component } from 'react';
import { View, StyleSheet, Text, Image } from 'react-native';
import DayComonent from '../modules/DayComonent';
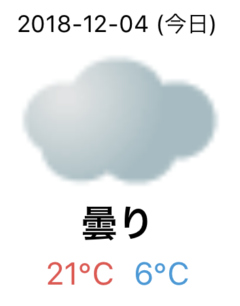
const dayWeather = [
{
dateLabel: "今日",
telop: "曇り",
date: "2018-12-04",
temperature: {
min: null,
max: {
celsius: "21",
fahrenheit: "69.8"
},
},
image: {
width: 50,
url: "http://weather.livedoor.com/img/icon/8.gif",
title: "曇り",
height: 31
}
},
{
dateLabel: "明日",
telop: "曇り",
date: "2018-12-05",
temperature: {
min: null,
max: {
celsius: "15",
fahrenheit: "59.0"
},
},
image: {
width: 50,
url: "http://weather.livedoor.com/img/icon/8.gif",
title: "曇り",
height: 31
}
},
]
export default class Weather extends Component<Props> {
render() {
return (
<View style={styles.weather}>
<Text style={styles.weatherTitle}>神奈川県 横浜市の天気</Text>
<View style={styles.dayWeather}>
<DayComonent weather={dayWeather[0]} />
<DayComonent weather={dayWeather[1]} />
</View>
</View>
);
}
}
const styles = StyleSheet.create({
weather: {
backgroundColor: '#fff',
paddingTop: 10,
borderRadius: 10,
marginBottom: 10
},
weatherTitle: {
fontSize: 18,
textAlign: 'center'
},
dayWeather: {
flexDirection: 'row',
justifyContent: 'center'
}
});
<DayComponent>を呼び出す際に一緒に、weatherというのを渡しています。これによって
<DayComponent>では、this.props.weatherとして使うことができます。それでは、
<DayComponent>を見てみましょうsrc/Modules/DayComponent.js
import React, { Component } from 'react';
import { View, StyleSheet, Text, Image, Dimensions } from 'react-native';

export default class DayComonent extends Component<Props> {
  render() {
    const { date, dateLabel, telop, temperature, image } = this.props.weather
    return (
      <View style={styles.dayComonent}>
        <Text style={styles.date}>{`${date} (${dateLabel})`}</Text>
        <Image style={styles.image} source={{uri: image.url}} />
        <Text style={styles.day_weather}>{telop}</Text>
        <View style={styles.dayTemperature}>
          <Text style={styles.dayTemperatureHigh}>
            { temperature.max? `${temperature.max.celsius}℃` : `16℃` }
          </Text>
          <Text style={styles.dayTemperatureLow}>
            { temperature.min? `${temperature.min.celsius}℃` : `6℃` }
          </Text>
        </View>
      </View>
    );
  }
}


const dimensions = Dimensions.get('window');
const imageHeight = Math.round((dimensions.width * 2) / 3);
const imageWidth = dimensions.width;
const styles = StyleSheet.create({
  dayComonent: {
    justifyContent: 'center',
    alignItems: 'center',
    padding: 10,
  },
  date: {
    fontSize: 12,
    paddingBottom: 5,
  },
  day_weather: {
    fontWeight: '600',
    paddingTop: 5,
    fontSize: 20,
  },
  image: {
    width: imageWidth * 0.3,
    height: imageHeight * 0.3,
    borderRadius: 30,
  },
  dayTemperature: {
    flexDirection: 'row',
    justifyContent: 'center',
    padding: 5,
  },
  dayTemperatureHigh: {
    fontSize: 16,
    color: '#eb4d4b',
    marginRight: 10,
  },
  dayTemperatureLow: {
    fontSize: 16,
    color: '#3498db'
  }
});
const { date, dateLabel, telop, temperature, image } = this.props.weatherここで親コンポーネントから来たpropsの値を変数に代入しています。
これで値を動的に変更することができます。
Reactでは非常によく使います。
基本的にapiとのやり取りをするのは一番上のコンポーネントでその結果を子コンポーネントに渡すことで、stateの管理をしやすくしています
これで無事表示の部分が完成しました!
textInputの出力の保存
ゴール
・stateを用いてinputの変更をconsoleに表示します。
ポイント
・stateを用いた状態管理。・stateをtextInputで変更する。
・JS Debug Remotlyを用いてのデバック
将来的なゴールは入力した値を元に、apiを用いて情報を取得することですが、今回はtextInputで入力した値をconsoleに表示するところまでやっていきたいと思います。
まずはdebugを自分のブラウザでできるようにしましょう!
Command + Dを押して、下の画像のブラウザでデバックできるようにしましょう!
できたらブラウザの開発者ツールを用いて準備完了です
このようにApp.jsを変更してください
App.js
export default class App extends Component<Props> {

  state = {
    inputText: '',
  }

  onChangeText(text) {
    this.setState({inputText: text})
    console.log(this.state.inputText);
  }

  render() {
    return (
      <SafeAreaView style={styles.safeAreaView}>
        <Header />
        <View style={styles.inputContainer}>
          <TextInput
            placeholder="検索"
            style={styles.textInput}
            onChangeText={ text => this.onChangeText(text)}
          />
        </View>
        <View style={styles.weatherContainer}>
          <Weather />
        </View>
      </SafeAreaView>
    );
  }
}
onChangeText={ text => this.onChangeText(text)}ここでは、TextInputのvalueが変更された時、
onChangeTextという関数を呼び出しています。onChangeTextの中身は、下のようになっています。
onChangeText(text) {
  this.setState({inputText: text})
  console.log(this.state.inputText);
}
onChangeText(text)引数にtextを取る関数です。
this.setState({inputText: text})でstateのinputTextを更新しています。
console.log(this.state.inputText);stateのinputTexは上のような書き方で取り出すことができます。
state = {
  inputText: '',
}
以上でtextInputの出力の保存が終了です!
次はいよいよTextInputの入力からapiを通じて地域の天気を取得しましょう!!
TextInputの入力からapiを通じて地域の天気を取得
ゴール
・欲しい地域の天気情報をconsoleに出力します
ポイント
・axiosを使って、apiとやりとりする。・onChangeTextからonEndEdthingにする
React Nativeではネットワーク用に、Fetch APIを提供してくれていますが、今回は簡略化のためにaxiosというパッケージを使います!
まずはaxiosを入れましょう。
ターミナルを開いて、projectの階層で
npm add axios
この時、iPhoneのシュミレーターがエラーになりますが、それはaxiosのpackageが読み込まれていないためです。
react-native run-ios
この処理を終了してから試してみてください!
これで下のようにimportしてあげれば準備は完了です。
App.js
import axios from 'axios';
ここで注意です!本来は自分の地域の名前を入力=>天気を表示させたかったのですが、こちらのLive Door天気情報APIが対応していないため、ここから住んでる地域に一番近のIDを探してください!笑
今回使うのは僕が大好きな横浜の天気を取ってきたいと思います。
横浜のIDが 140010 であるので、
App.js
//省略
import axios from 'axios';

const baseRequest = axios.create({
  baseURL: 'http://weather.livedoor.com/forecast/webservice/json/',
  responseType: 'json',
})


export default class App extends Component<Props> {

  state = {
    inputText: '',
  }

  onChangeText(text) {
    baseRequest
      .get('v1', {params: {city: text} })
      .then( res => {
        console.log(res.data);
      })
      .catch( error => {
        console.log(error.response);
      });
    this.setState({inputText: text})
  }

  render() {
    return (
      <SafeAreaView style={styles.safeAreaView}>
        <Header />
        <View style={styles.inputContainer}>
          <TextInput
            placeholder="検索"
            style={styles.textInput}
            onChangeText={ text => this.onChangeText(text)}
          />
        </View>
        <View style={styles.weatherContainer}>
          <Weather />
        </View>
      </SafeAreaView>
    );
  }
}
下に詳細を乗っけていますので一つ一つ確認していきましょう
const baseRequest = axios.create({
  baseURL: 'http://weather.livedoor.com/forecast/webservice/json/',
  responseType: 'json',
})
基本的な設定はこのようにconstで定義して起きましょう。
baseRequest
  .get('v1', {params: {city: text} })
  .then( res => {
    console.log(res.data);
  })
  .catch( error => {
    console.log(error.response);
  });
今回はcityとしてparamsの値は固定にしてあります。
このようにlogに表示されたら完成です!
しかし、今回onChangeTextで毎回リクエストを飛ばしてしまっているため、無駄なリクエストが飛んでしまいます!
リクエストを投げる時を一回、つまりtextの変更が終わってから飛ばすようにします。
下のように変更してください。
App.js
//省略
onEndEditing(text) {
  baseRequest
    .get('v1', {params: {city: text} })
    .then( res => {
      console.log(res.data);
    })
    .catch( error => {
      console.log(error.response);
    });
  this.setState({inputText: text})
}

//省略
<TextInput
  placeholder="検索"
  style={styles.textInput}
  onEndEditing={ e => this.onEndEditing(e.nativeEvent.text)}
/>
ここで注意が必要なのが、
onEndEdithingから渡ってくるものはtextではないところです。
<TextInput
  placeholder="検索"
  style={styles.textInput}
  onEndEditing={ e => this.onEndEditing(e.nativeEvent.text)}
/>
apiからのレスポンスを表示
ゴール
・apiから返ってきた情報を表示する。
ポイント
・propsをつかって子コンポーネントに情報を渡す。ここから今まで使ってきたことの組み合わせになります。
まずはコードを確認してください!
App.js
import React, { Component } from 'react';
import { StyleSheet, Text, View, SafeAreaView, TextInput } from 'react-native';
import axios from 'axios';

import Header from './src/component/Header';
import Weather from './src/component/Weather';

type Props = {};

const baseRequest = axios.create({
  baseURL: 'http://weather.livedoor.com/forecast/webservice/json/',
  responseType: 'json',
})


export default class App extends Component<Props> {

  state = {
    information: [],
  }

  onEndEditing(text) {
    baseRequest
      .get('v1', {params: {city: text} })
      .then( res => {
        this.setState({information: res.data})
      })
      .catch( error => {
        console.log(error.response);
      });
    this.setState({inputText: text})
  }

  render() {
    return (
      <SafeAreaView style={styles.safeAreaView}>
        <Header />
        <View style={styles.inputContainer}>
          <TextInput
            placeholder="検索"
            style={styles.textInput}
            onEndEditing={ e => this.onEndEditing(e.nativeEvent.text)}
          />
        </View>
        <View style={styles.weatherContainer}>
          <Weather information={this.state.information}/>
        </View>
      </SafeAreaView>
    );
  }
}
//省略
・Weatherコンポーネントにpropsとしてinformationを渡す。
src/component/Weather.js
//省略
export default class Weather extends Component<Props> {
  render() {
    const information = this.props.information
    const title = this.props.information.title
    const weatherInformation = this.props.information.forecasts

    function InformationExit() {
      if (information.length != 0) {
        return(
          <View style={styles.weather}>
            <Text style={styles.weatherTitle}>{title}</Text>
            <View style={styles.dayWeather}>
              <DayComonent weather={weatherInformation[0]} />
              <DayComonent weather={weatherInformation[1]} />
            </View>
          </View>
        )
      } else {
        return(
          <View></View>
        )
      }
    }


    return (
      <InformationExit />
    );
  }
}
//省略
・app.jsからやってきたpropsを定数に代入。
・informationがまだない時は、空のViewコンポーネントを返す。
・タイトルを動的に変更するようにした。
これで遂にアプリが完成です!
お疲れ様でした����
完成形
ここにgifが入る予定。
終わりに
最後の方は駆け足になってしまいましたが、これで完成です!本当はもうちょっと補足したいのですが、そこは加筆いたしますmm
最初はyoutube APIを使いたかったのですが、認証やアクセスキーを作ったりと少し煩雑だったので、使いやすいAPIを探すに結構苦労しました(汗
でもこういった記事を書くのが初めてでしたが、結構楽しかったです!
公開が遅くなりまして申し訳ないですmm
明日はふみっちの「iOS純正アプリカレンダーのデータを取得する記事」です!
カレンダーの取得はやってみたことがないので今から楽しみですね✨他のメンターの記事もお楽しみに!!
コメント
コメントを投稿